Tempering chocolate transforms it into professional-quality confections with a perfect snap, shine and stability. Furthermore, mastering temperature control techniques allows home chocolatiers to create stunning truffles, bonbons and decorations. Understanding the science and methods of tempering can elevate chocolate making from a hobby to an artisan craft.
What Makes Chocolate Tempering Essential for Quality?
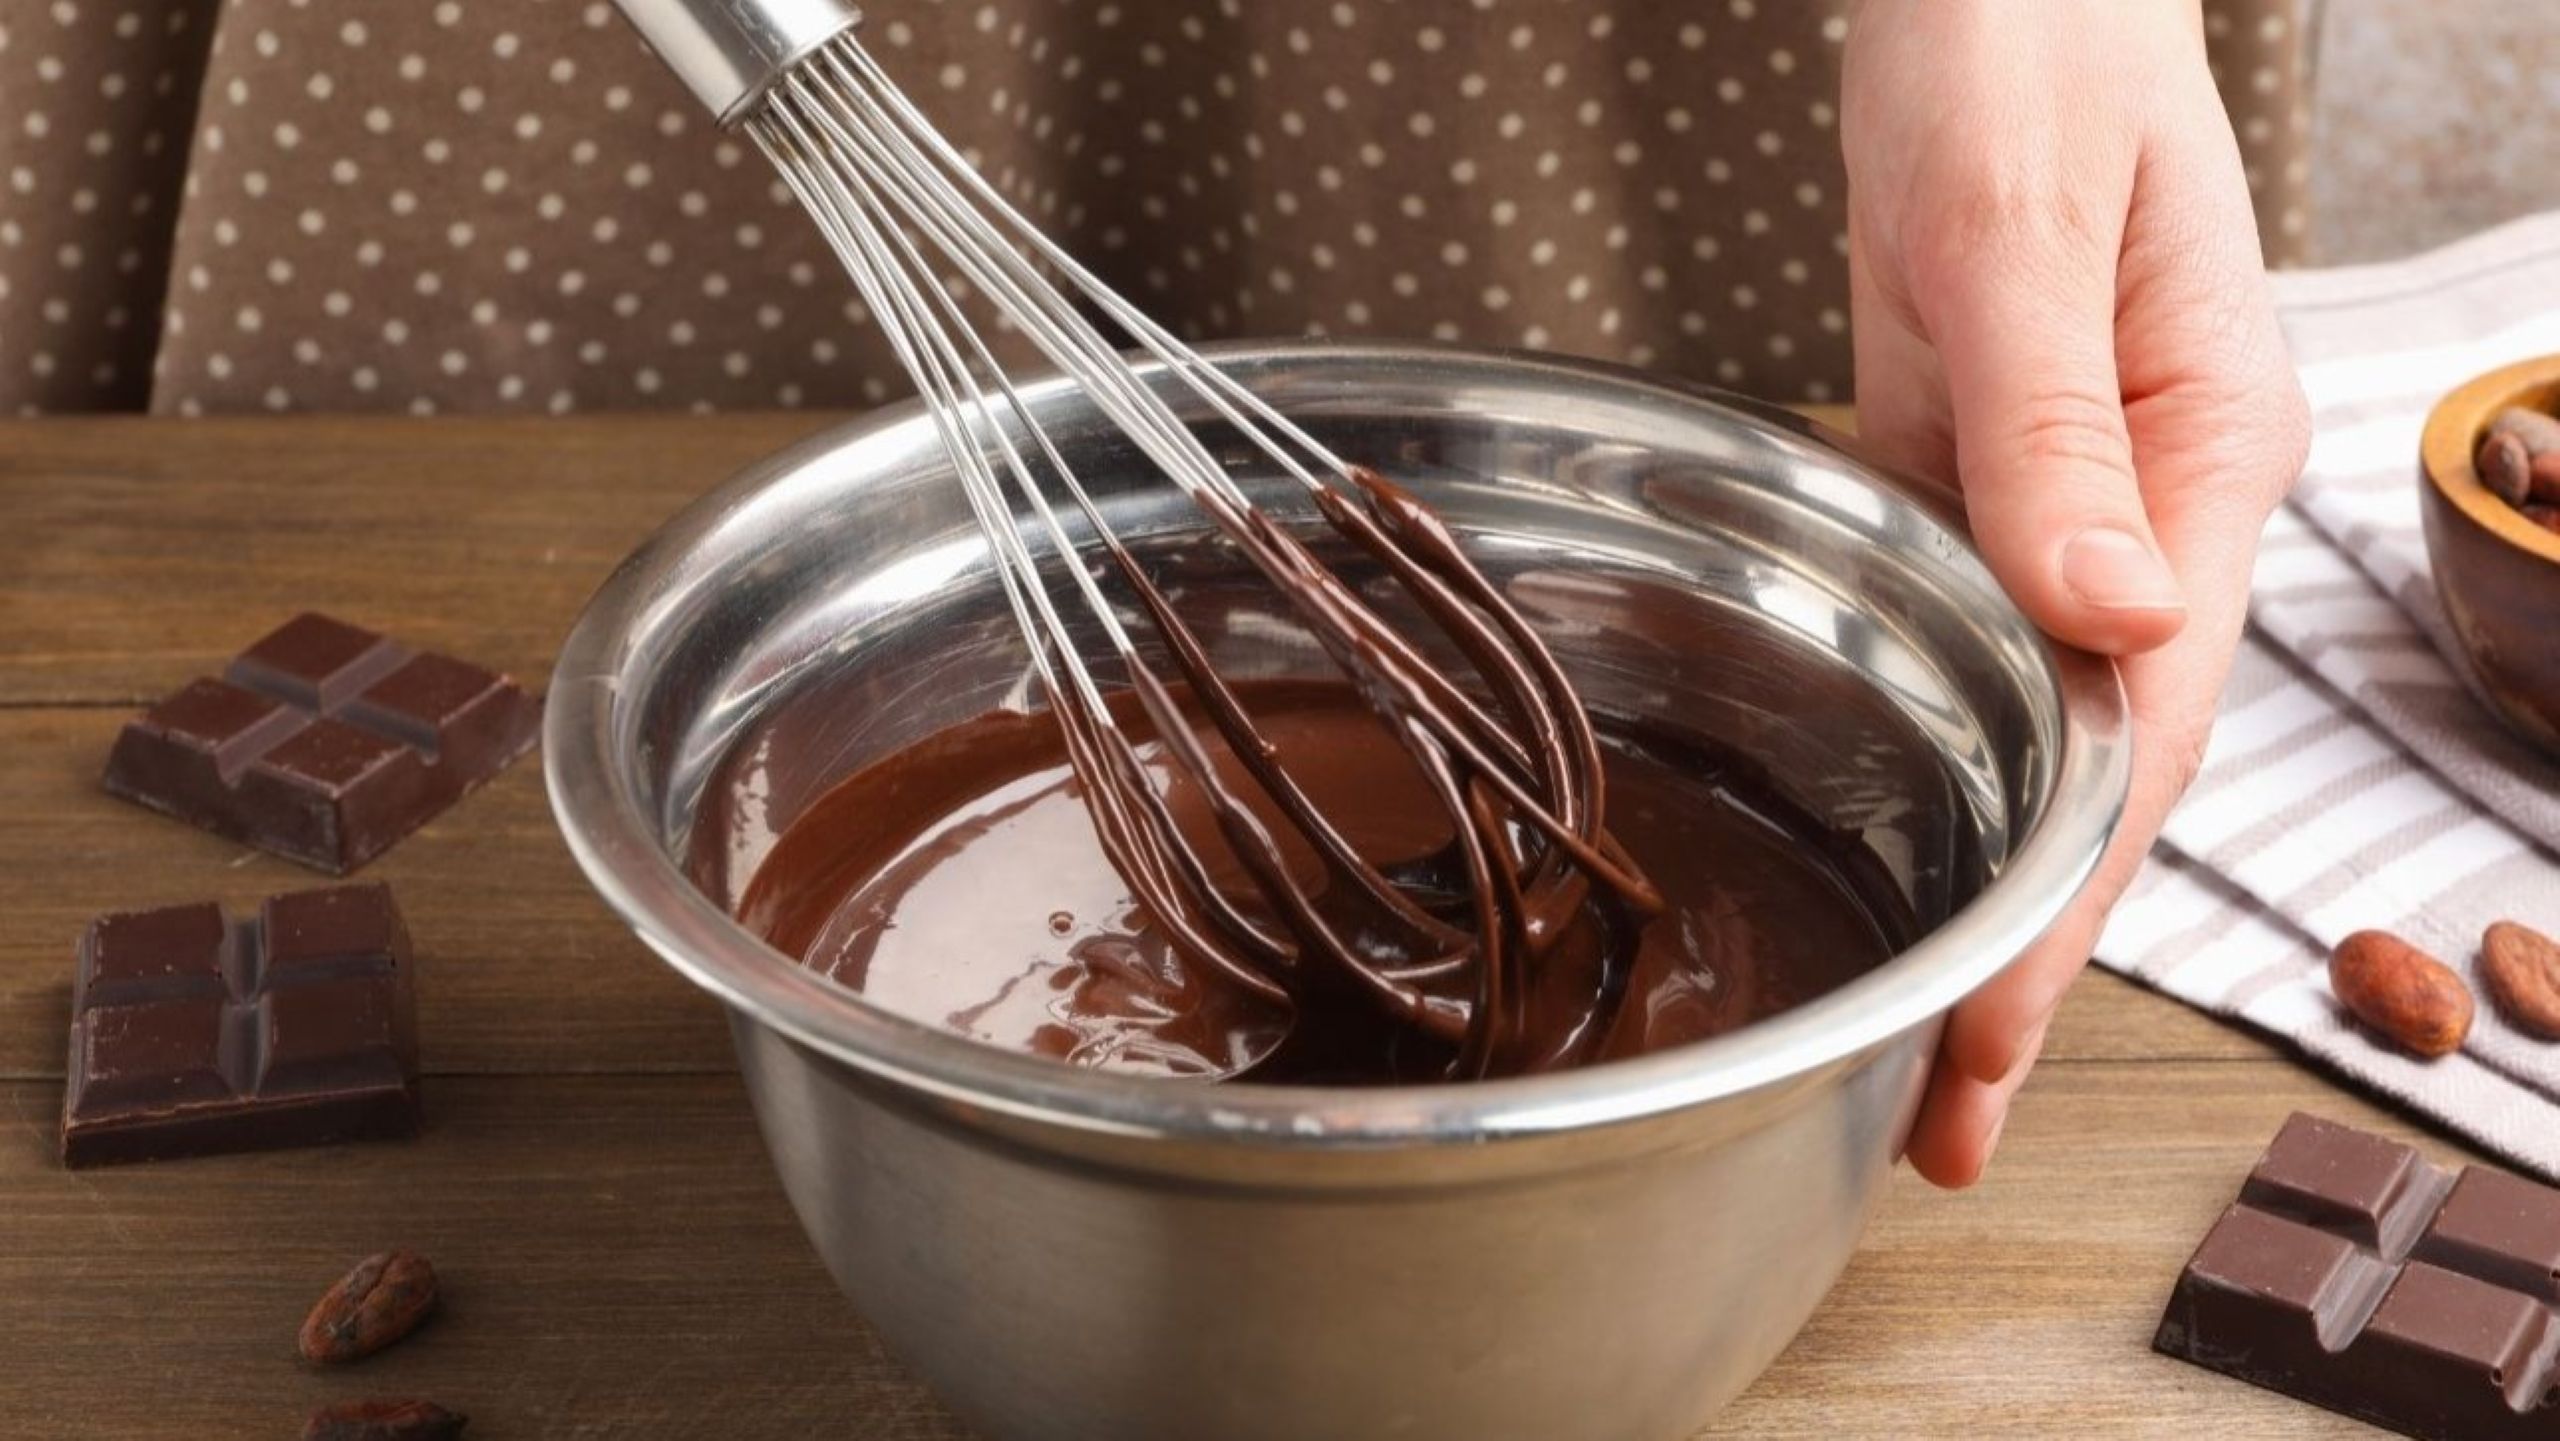
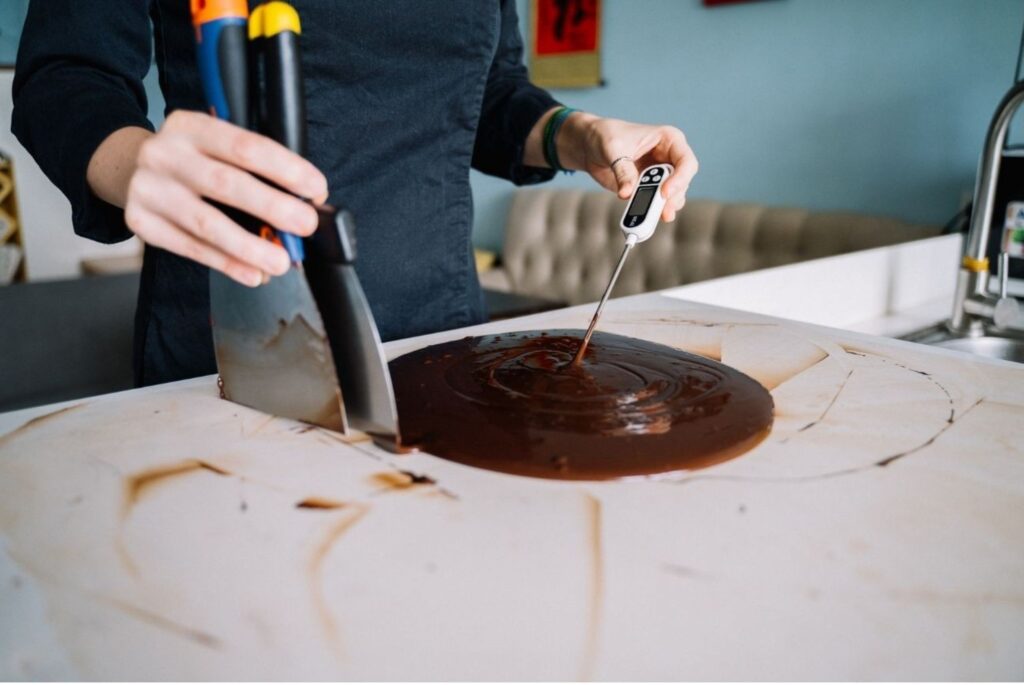
Chocolate tempering aligns cocoa butter crystals creating stable structure. Consequently, properly tempered chocolate exhibits glossy appearance and crisp snap. Professional chocolatiers recognize tempering as fundamental skill mastery.
Additionally, untempered chocolate appears dull with white streaks (bloom). Therefore, temperature control prevents fat separation and crystallization issues. Moreover, tempered chocolate sets quickly at room temperature maintaining form.
Cocoa butter exists in six crystal forms (polymorphs) with different melting points. For instance, Form V crystals provide ideal characteristics professionally. Thus, tempering process encourages Form V formation while eliminating others.
Which Chocolate Tempering Methods Work Best at Home?
Tabling/marble method traditional technique using marble slab cooling chocolate. Furthermore, two-thirds melted chocolate spread on marble working continuously. Professional chocolatiers prefer this method for precision control.
Seeding method adding unmelted chocolate (seed) to melted chocolate. However, simplest home method requiring only thermometer and bowl. Also, seed chocolate provides stable crystals encouraging proper formation.
Microwave method carefully melting chocolate in short bursts stirring. Meanwhile, residual heat continues melting between intervals preventing overheating. Certainly, requires attention and practice achieving consistency.
Sous vide method maintaining precise water bath temperature eliminating guesswork. For example, immersion circulator holds chocolate at exact tempering. Besides, hands-free approach allows multitasking during preparation.
How Do You Execute Seeding Method Successfully?
Chop chocolate finely ensuring uniform melting and temperature distribution. Nevertheless, smaller pieces melt faster and more evenly. Specifically, aim for pea-sized pieces or smaller consistently.
Melt two-thirds chocolate over double boiler or microwave carefully. On the other hand, dark chocolate melts to 45-50°C maximum. Additionally, milk chocolate reaches 40-45°C and white 40-43°C.
Add remaining chocolate (seed) stirring constantly until completely melted. For instance, temperature drops to working range through absorption. Besides, unmelted chocolate provides stable crystal structure template.
Test temper by spreading small amount on parchment observing set. Thus, properly tempered chocolate sets within 3-5 minutes developing. Furthermore, slight sheen and snap indicate successful tempering.
What Professional Chocolatiers Say About Tempering Mastery?
Jacques Torres, Master Chocolatier
“Chocolate tempering separates hobbyists from professional chocolatiers fundamentally. Professional methods require understanding physics and practice developing feel. Additionally, temperature precision determines final product quality completely.”
“I’ve tempered thousands of kilograms perfecting technique over decades. Technique mastery comes through repetition and attention to detail. Furthermore, ambient temperature and humidity affect tempering requiring adaptations. Home chocolate making achieves professional results with proper knowledge.”
Uruguayan Asado: Grill & Mate Culture
Uruguayan asado brings people together through slow-grilled meat and mate tea. Discover South American grill traditions and social rituals.
Belgian Fries: Best Potato Varieties
Belgian fries demand the right potatoes for that perfect crispy exterior and fluffy interior. Therefore, choosing the correct variety makes...
April Fools: Fish, Food & Fun Origins
April Fools has a secret and it smells like the sea. Every year on April 1, millions of people worldwide...
Beer Workshop Success in 7 Simple Steps
Planning a Beer Workshop combines two popular passions into one memorable event. Additionally, pairing craft brews with live music creates...
Which Temperature Ranges Apply to Different Chocolates?
Dark chocolate (70%+ cacao) melts to 45-50°C initially. Therefore, working temperature maintained at 31-32°C for tempering. Currently, higher cocoa butter content requires precise control.
Milk chocolate melts to 40-45°C avoiding scorching milk. As a result, working temperature stays at 29-30°C consistently. Moreover, milk solids increase temperature sensitivity significantly.
White chocolate melts to 40-43°C preventing separation completely. Indeed, working temperature maintained at 28-29°C carefully always. Also, contains no cocoa solids only cocoa butter.
Colored/compound coating does not require tempering due to. Nevertheless, vegetable fats instead of cocoa butter eliminate crystallization. Undoubtedly, lacks authentic chocolate flavor and texture quality.
Temperature monitoring using digital thermometer ensures accuracy within 1°C. Meanwhile, infrared thermometers provide non-contact instant readings surface. Also, ambient room temperature affects cooling and setting.
Working environment maintained at 18-20°C with 50% humidity ideally. Thus, warm kitchens slow setting while cold causes premature. Furthermore, humidity creates condensation causing sugar bloom defects.
What Common Tempering Problems and Solutions Exist?
Chocolate won’t set indicates insufficient cooling or over-tempering. Meanwhile, re-melt and re-temper starting process fresh completely. Also, check ambient temperature ensuring cool enough environment.
White streaks/bloom from fat separation due to incorrect temperature. However, chocolate remains safe eating but appears unprofessional. Besides, re-tempering fixes bloom restoring proper appearance.
Thick/lumpy texture suggests water contamination or overheating damage. For instance, even small water amounts cause seizing instantly. Thus, ensure all equipment completely dry before starting.
Dull finish results from insufficient agitation or wrong crystal formation. Nevertheless, working chocolate longer encourages proper crystallization development. Specifically, continuous stirring during cooling phase critical.
Soft texture indicates under-tempering with unstable crystal structure. Therefore, chocolate melts at room temperature lacking proper snap. Furthermore, refrigeration masks problem temporarily but doesn’t fix.
Rapid setting before work completed suggests over-tempering with excessive. Meanwhile, gentle reheating to upper working temperature range. Also, working quickly and efficiently prevents premature setting.
Conclusion: Mastering Chocolate Tempering for Home Excellence
Tempering chocolate elevates home chocolate making to professional standards. Moreover, precise temperature control enables the creation of stunning confections with perfect characteristics.
Begin by mastering the seeding method and the basics before attempting more advanced techniques. Furthermore, invest in an accurate thermometer and maintain an ideal working environment. Practise consistently to develop a feel for the proper consistency and timing.
Embrace mistakes as learning opportunities, refining your technique progressively. Indeed, professional chocolatiers spend years perfecting their tempering skills. Begin your chocolate tempering journey by creating beautiful artisan chocolates.


